Analysis of 1D Line-Broadening Screen: Difference between revisions
m (1 revision: Protocols) |
(No difference)
|
Revision as of 00:02, 13 March 2012
Using ACD-NMR
Move Files
Open a PuTTY session with bionmr-c1 or reboot into Linux on your workstation. Navigate to /home/DATA/FAST_NMR (which is of course /DATA/FAST_NMR from a workstation) and run the gambrinus-get command.
NOTE: It is advised that you store all directories created by a 1D screen in a single directory on Gambrinus. For example, proteins already have their own folder on Gambrinus, so place all the Protein-YYYYMMDD-mixn or FREE-YYYYMMDD-mixn directories inside Protein/ or FREE-YYYYMMDD/, respectively. (All further examples will use Protein as the protein name, YYYYMMDD to represent the date of a new screen, and mixn to represent the mixture number.)
Downloading Free Mixtures
To download free mixtures from Gambrinus:
./gambrinus-get FREE-YYYYMMDD FREE-Mixtures-YYYYMMDD
Downloading Protein Screens
If previous data exists in the Protein/1D directory, make sure to move it before downloading the new data:
cd Protein/
mv 1D 1D-old-yyyymmdd
cd ..
To download 1D screens of a protein from Gambrinus:
./gambrinus-get Protein/1D-YYYYMMDD Protein/1D
Run Macro
Open ACD 12 1D NMR Processor
Click the "1D NMR Macro" button
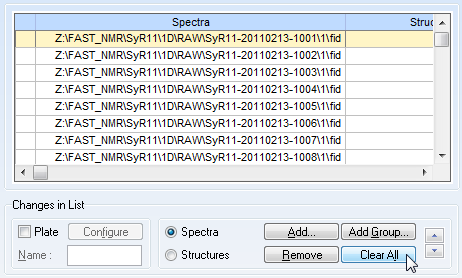
This will open up the following screen. If there are files listed, clear them.
Then click "Add Group" to choose multiple files for running the macro.
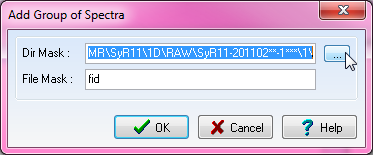
When the window pops up, click on the ellipses on the other side of the "Dir Mask:" category.
Be sure the "File Mask:" category had "fid" in the box.
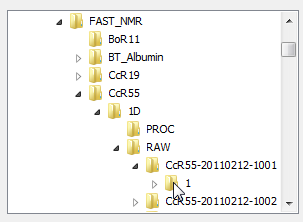
Find your protein. As explained in this page: 1D Line Broadening Screen For FAST-NMR, your files should be in the correct file type. In order to upload multiple files, you need to select the directory one of your fid files will be in, and use wild cards (asterisk: ***) for the correct number of characters representing the various mixture names (i.e. 1*** will show any of the mixtures we currently have).
Please note if you have different dates, you should use wild cards as needed there.
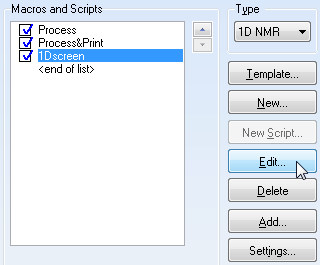
Now that you have verified your files have all been uploaded, it is time to edit the macro! :) Select macro as such:
Be sure you have highlighted the "1D Screen" macro. Click OK and this next screen should pop up.
This macro (1D Screen) is located in DATA/FAST-NMR/ and is saved again every time someone runs it, so be sure to edit the macro first, so you don't write over other files.
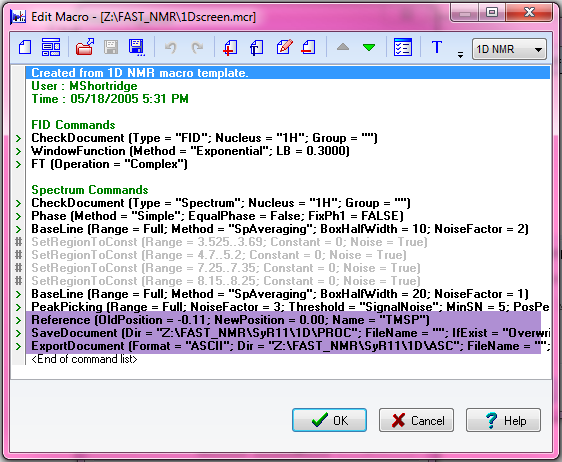
This is an example of the macro:
File here: File:1Dscreen.mcr.txt
The area highlighted in the purple color are the areas you need to change. If you do not change where these files save, you will overwrite other files. In order to change a line, double click on it.
The first line help you reference your TMSP peak. If you wish to run the macro on only one fid, you can look at the processed file to check where the reference is, if you wish.
The second line lets you choose where to put your processed 1D NMR file. You should place them in the PROC folder in the same parent folder the RAW folder you used earlier.
The third line allows you to choose where to place the ASCII file needed for the Bioscreen database. Once again, this should be placed in the ASCII directory in the parent folder for the 1D protein screen.
When you have finished editing the macro, go ahead and run it.
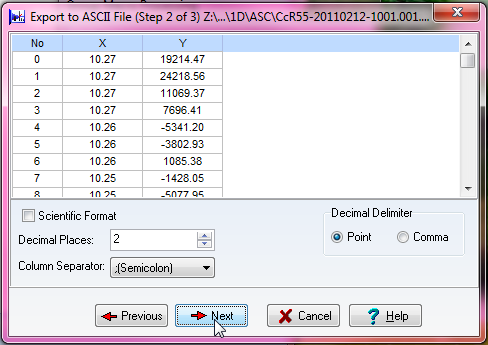
When you run it, it will ask you if you wish to run it, say yes. The following figure shows the choices you should make in exporting the ASCII files.
Check Data
Files are processed and you have all the right nomenclature and file structures.
Copy the processed files into your PROC folder from the most recent FREE mixture spectra. Be sure to copy and not move.
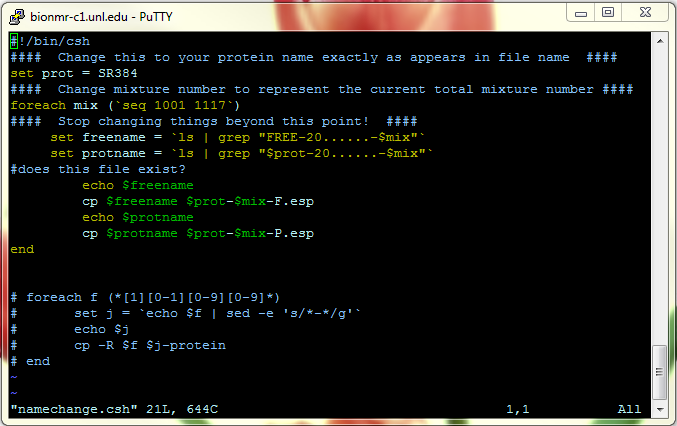
Copy the .com into your PROC folder from the FAST-NMR directory /DATA/FAST_NMR/namechange.csh
Open PuTTY and modify the namechange.csh file The ONLY thing you should need to change, assuming you have used standard naming protocols while running your NMR experiments, is the protein name. If there are more than 117 mixtures, you will need to change the number of mixtures as well.
File here: File:Namechange.csh.txt
Print off binding sheet File:Binding Sheets.xls, and change the protein name to match your protein.

